Eyebrow Mapping: The Complete Guide for Perfect Results
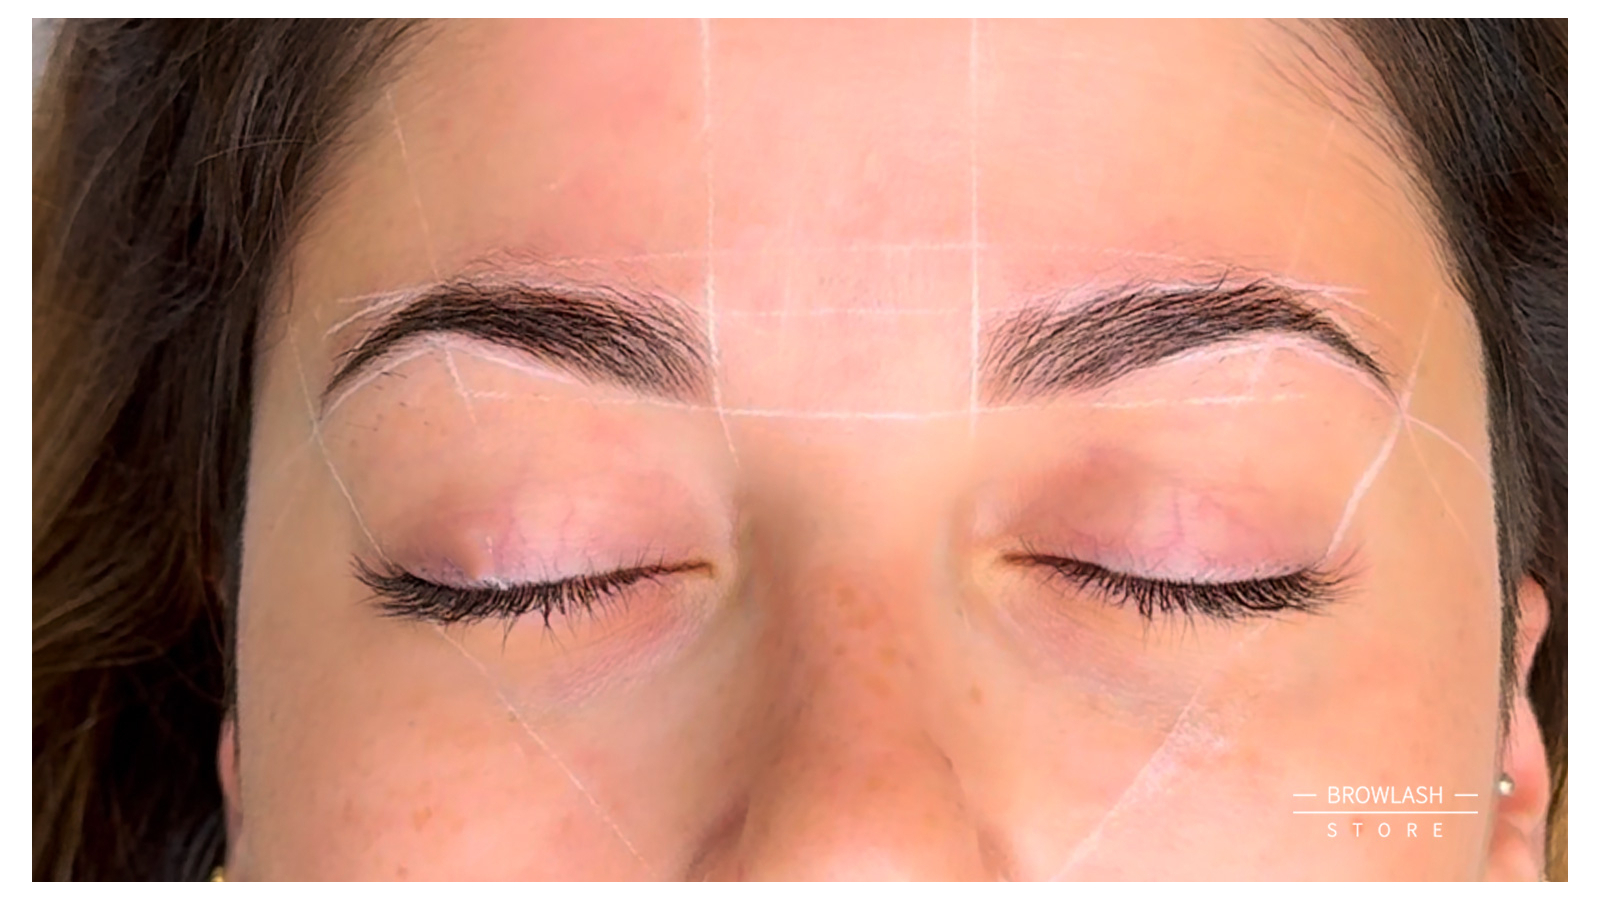
The 3 key reference points and the complete method for perfect symmetry
Two perfectly symmetrical brows are never achieved by eye. The difference between a correct result and a truly flawless one comes down to a step too many professionals skim over: mapping, or charting the brows. It is the method that lets you measure, draw and validate the ideal shape before touching a single hair. In this complete guide, we break down the why and the how, point by point.
What is mapping and why it is the basis of everything
Mapping means measuring and drawing the ideal brow shape according to the face shape, before starting the treatment. In practice, you locate three key points (the start, the highest point and the end of the brow), you connect them, and you get a precise map to work from.
Why is it essential? For three reasons. First, symmetry: mapping gives you measurable references on both sides, instead of relying on your perception. Second, face shape: the same shape does not suit every face, and mapping forces you to adapt the line to the person in front of you. Finally, reproducibility and the client relationship: a mapped shape is explained, validated with the client before you start, and reproducible from one session to the next. Without mapping, you work by feel, and the slightest discrepancy shows immediately on a face.
The tools you need
Mapping does not require much, but each tool has its role:
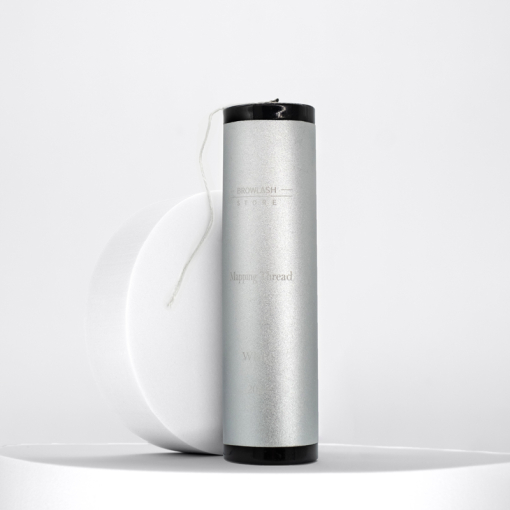
- A mapping thread (or a brow compass) to draw straight lines and identify alignments.
- A graduated brow ruler to compare the left and right measurements numerically.
- A spoolie brush to comb the hairs and read their growth direction.
You will find these essentials in our brow accessories section.
Understanding natural asymmetry
An essential point before drawing anything: no face is symmetrical. One eye is often slightly higher than the other, one brow bone more pronounced, the hair denser on one side. This is normal and present in everyone. The role of mapping is not to copy this asymmetry, but to compensate for it visually so that both brows appear balanced. This is exactly why you measure both sides before starting either one: if you finish one brow before mapping the second, you discover the gap too late.
The 3 reference points, explained
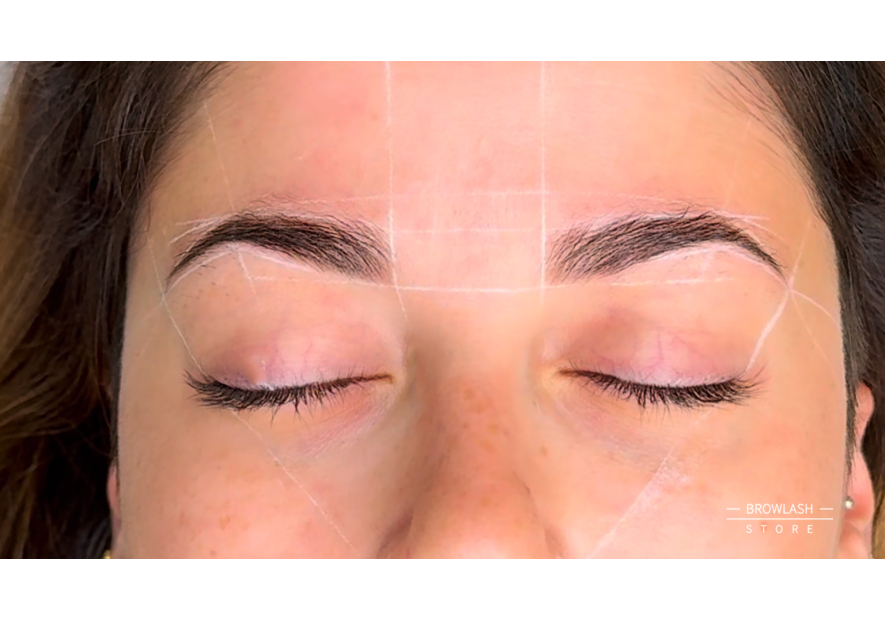
The whole charting rests on three points, all defined from the client's nostril. The gaze must stay straight ahead, horizontal, during the measurements.
- The start point (the head of the brow): draw a vertical line from the nostril up to the inner corner of the eye. The brow should begin at that vertical. A start drawn too far inward narrows the gaze; too far outward spaces it excessively.
- The arch point (the peak): draw a diagonal line from the nostril through the outer edge of the iris, still with the gaze straight ahead. Where that line crosses the brow is its highest point. This point sets the openness of the gaze: too far in and it hardens, too far back and it drops.
- The end point (the tail): draw a diagonal line from the nostril through the outer corner of the eye. The brow should end on that line. Ideally, the tail sits at the same height as the head, or very slightly lower, never higher.
Connect these three points and you get the base structure, common to both brows. It is your safeguard against asymmetry. A useful nuance: some schools place the arch in line with the pupil rather than the edge of the iris. What matters is not the exact convention, but keeping the same reference on the right and the left.
The step-by-step method
Here is the full sequence, with the logic behind each step:
- Cleanse and degrease the area. Marks do not hold on oily skin and products grip poorly. A foam like the Lash Foam does the job, then dry.
- Comb the hairs. First upward, then in their natural direction, to read the real hair growth and spot sparse zones or cowlicks.
- Mark the 3 reference points on each brow with a white pencil, using the nostril as the starting point of the lines.
- Connect the points with the mapping thread to draw the top line, the bottom line and position the arch. You then visualise the complete shape.
- Check the symmetry numerically. Compare, with the ruler, the height of the start, the position of the arch and the total length between the left and right sides. This is where you correct the natural asymmetry.
- Adjust before you work. Correct the lines while they are still just marks. Once you tweeze, tint or restructure, it is too late.
Adapting the shape to the face
Mapping gives the structure, the face shape gives the style. It is up to you to modulate the arch and thickness while keeping the base symmetrical:
- Round face: a pronounced arch, set fairly high, visually lengthens and breaks the roundness.
- Long face: a more horizontal line with a soft arch reduces the impression of length.
- Square face: a slightly rounded arch softens the angles of the jaw.
- Heart or triangular face: a medium arch and a not-too-thin tail balance the forehead and chin.
In all cases, you start from the mapped structure: the face shape refines the form, it does not replace the reference points.
Reading the hair growth direction
Mapping is not limited to the three points: it also takes in the way the hair grows. As you comb, you spot the zones where the hair grows downward, upward or in a cowlick. This reading shapes what follows: it tells you which way to discipline the hairs during a brow lift, or how far to visually fill a sparse area. Good mapping is therefore as much about measuring as about observing.
Bringing mapping into your treatments
Mapping is not reserved for tweezing: ideally it precedes every brow treatment. Before a brow lift restructuring, it defines the direction in which to fix the hairs for a disciplined result. Before a hybrid tint or airbrush work, it precisely delimits the area to colour, for a clean outline and a tailored result. It is the first step that makes all the others easier and more consistent.
Common mistakes to avoid
- Relying on the existing shape rather than the reference points (you then reproduce the flaws).
- Marking one brow at a time and discovering the asymmetry too late.
- Neglecting the degreasing: the marks slide and distort the whole drawing.
- Measuring with the client's gaze lowered or raised, which shifts the alignments.
- Imposing a "trendy" shape without considering the face or the client's approval.
FAQ
Is eyebrow mapping really necessary every time?
Even on a regular client, the hair growth evolves and an eye may have shifted slightly. A quick mapping ensures the consistency of your results and reassures the client.
How long does a mapping take?
Two to five minutes once you have mastered the method. Time well repaid by the precision of the result and client satisfaction.
Where exactly do you place the arch?
In line with the outer edge of the iris, gaze straight ahead, starting from the nostril. Some conventions use the pupil: above all, keep the same reference on both sides.
Can you map very sparse brows?
Absolutely, and it is even more useful then: mapping is used to visually rebuild a coherent line before tinting, restructuring or make-up.
In summary
Mapping is the backbone of every successful brow treatment: three reference points measured from the nostril, a reading of the growth direction, a numerical symmetry check and an adaptation to the face shape. It is this rigour, invisible in the final result, that turns nice work into a truly professional, symmetrical result.
To equip yourself and progress: discover our brow range and refine your technique with our lash and brow training courses.